The Making of 'The Interstellar Medium' #7 - Modeling & Texturing Pioneer

So this probably should have been the first blog post in this series, seeing as it was the first thing that I did - however this model went through so many changes that it's only now at the end of creating the film I have something to show off!

The main focus of the film (as i'm sure you are aware if you've read my other posts) are the Pioneer Probes 10 & 11. Both probes are extremely similar, the only main difference being Pioneer 11 carried an extra instrument to measure the magnetic fields of Jupiter and Saturn, however for easy I created just Pioneer 11, as the difference was almost impossible to spot.

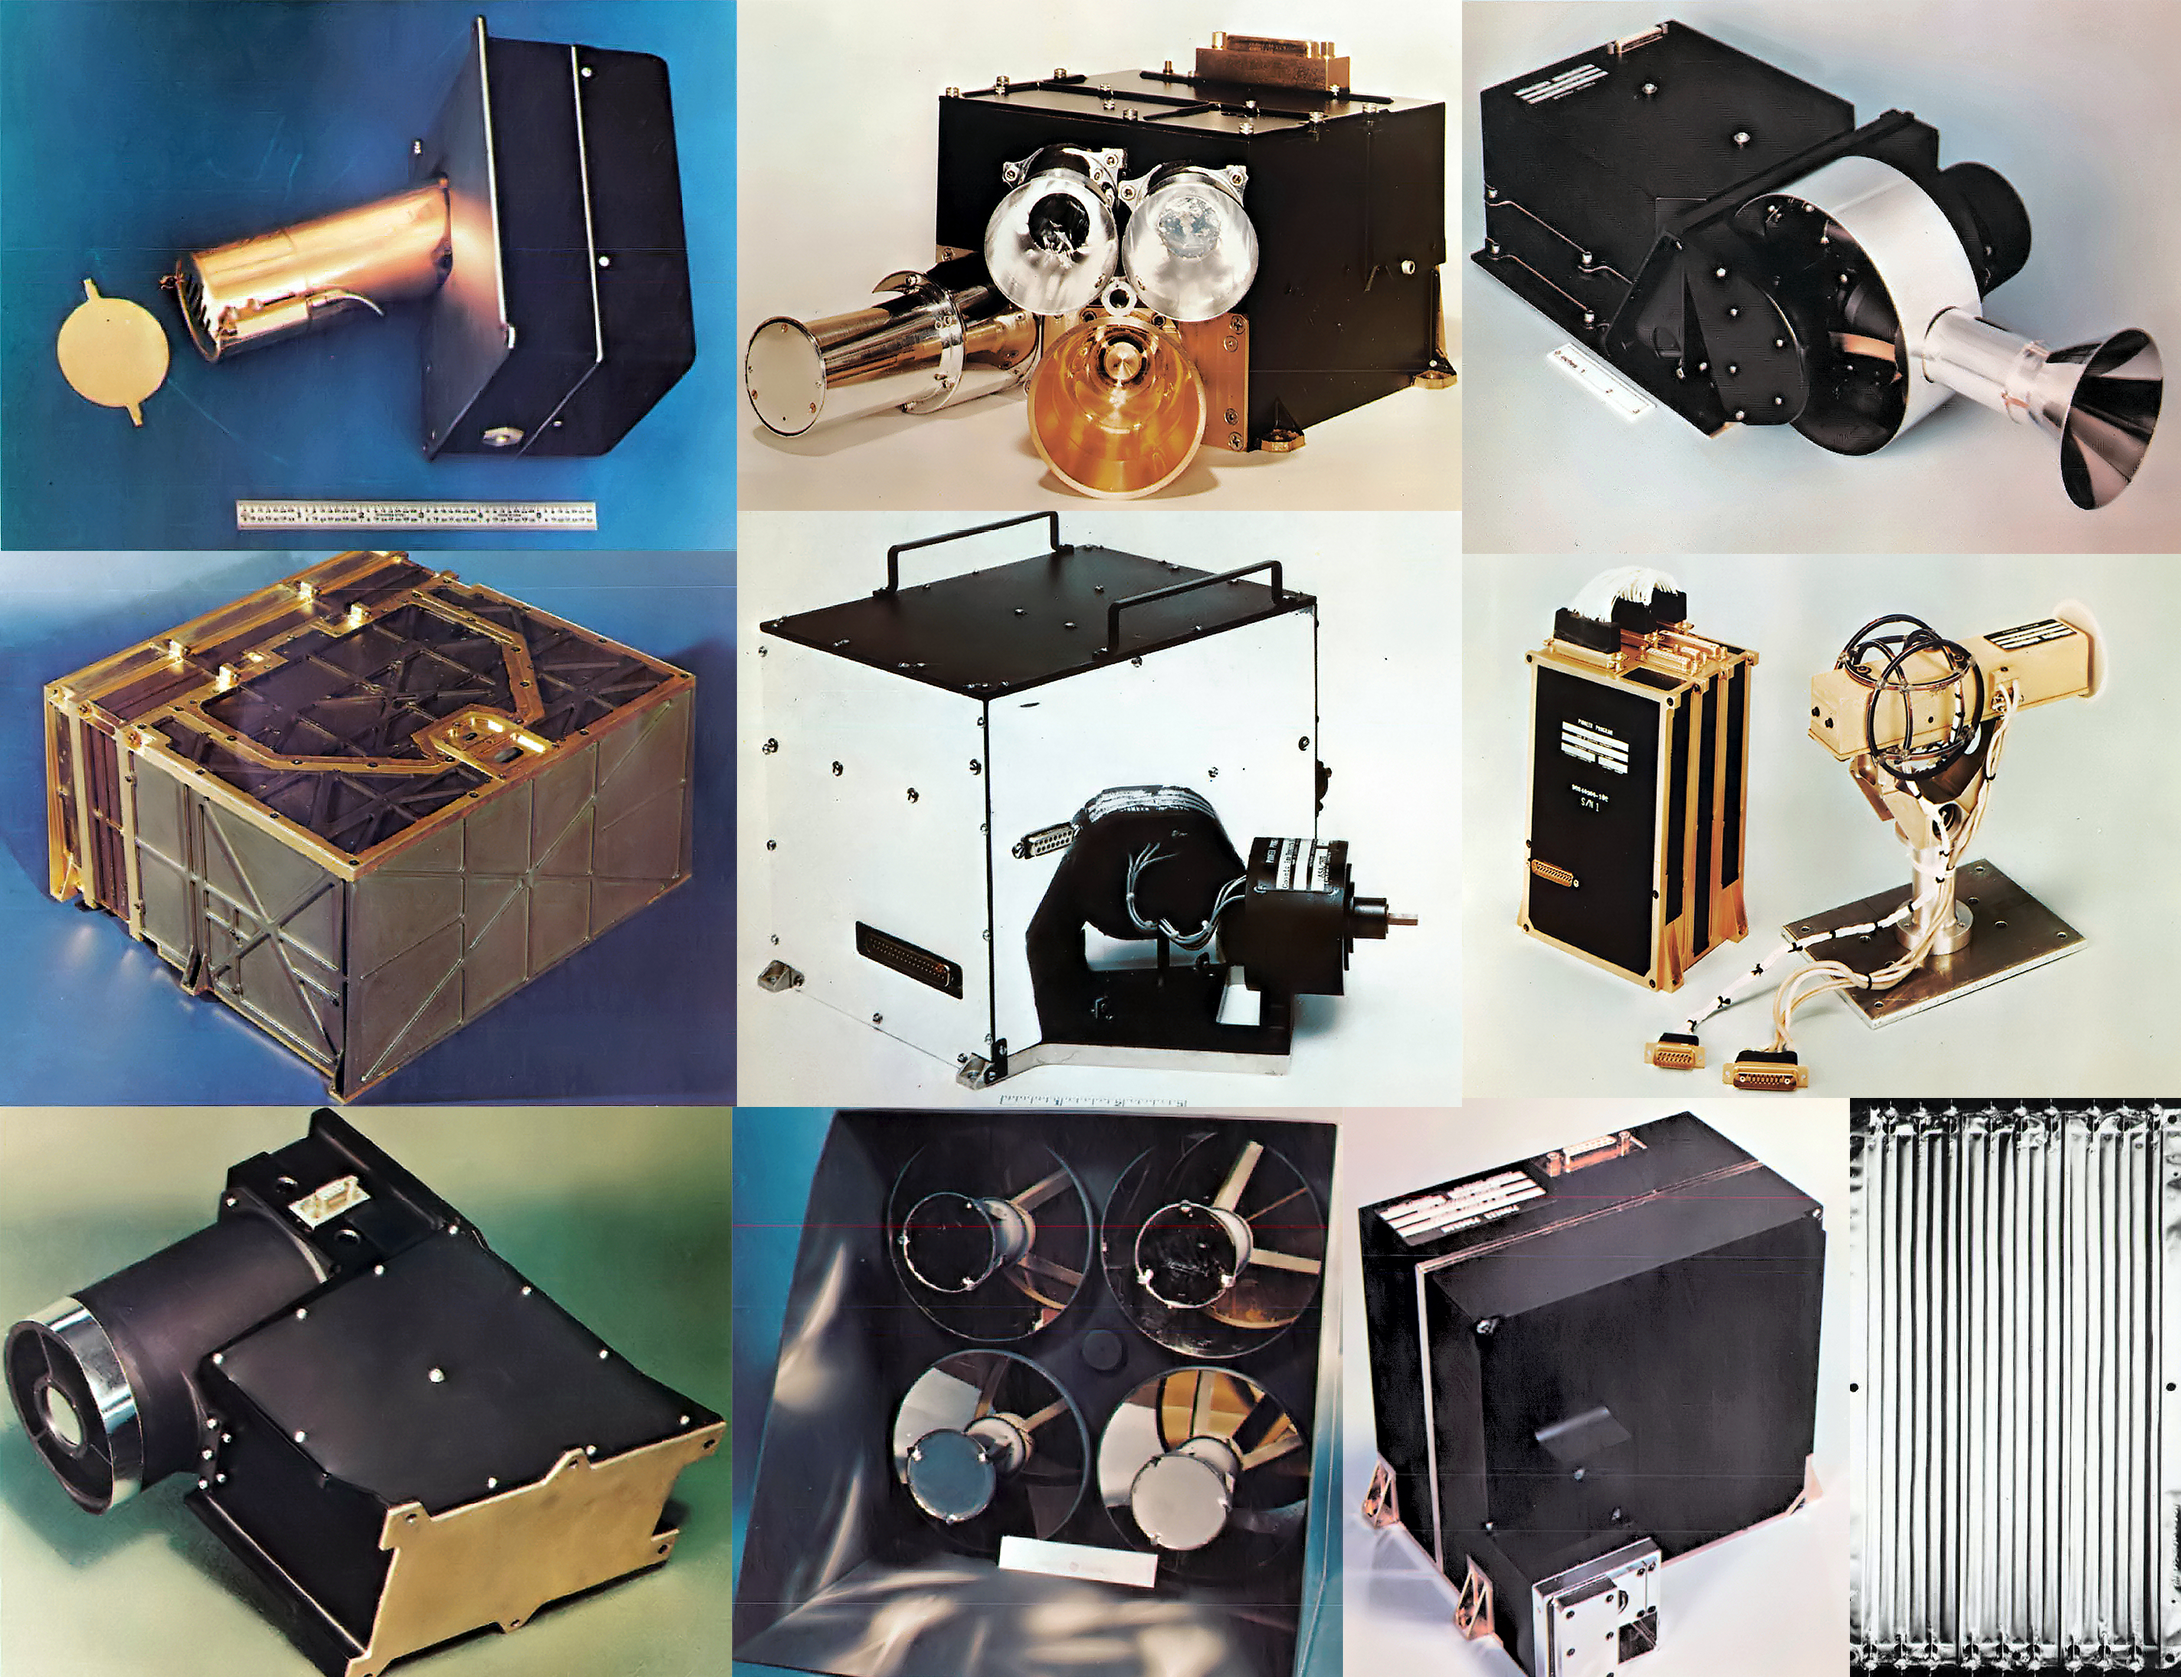
I found a number of technical drawings, and some pictures of individual instruments which really helped when it came to modeling. I was able to create everything to scale, which was ideal given I was rendering with Cinema 4D's Physical renderer (which is physically accurate!). Below are some of the reference images I used.

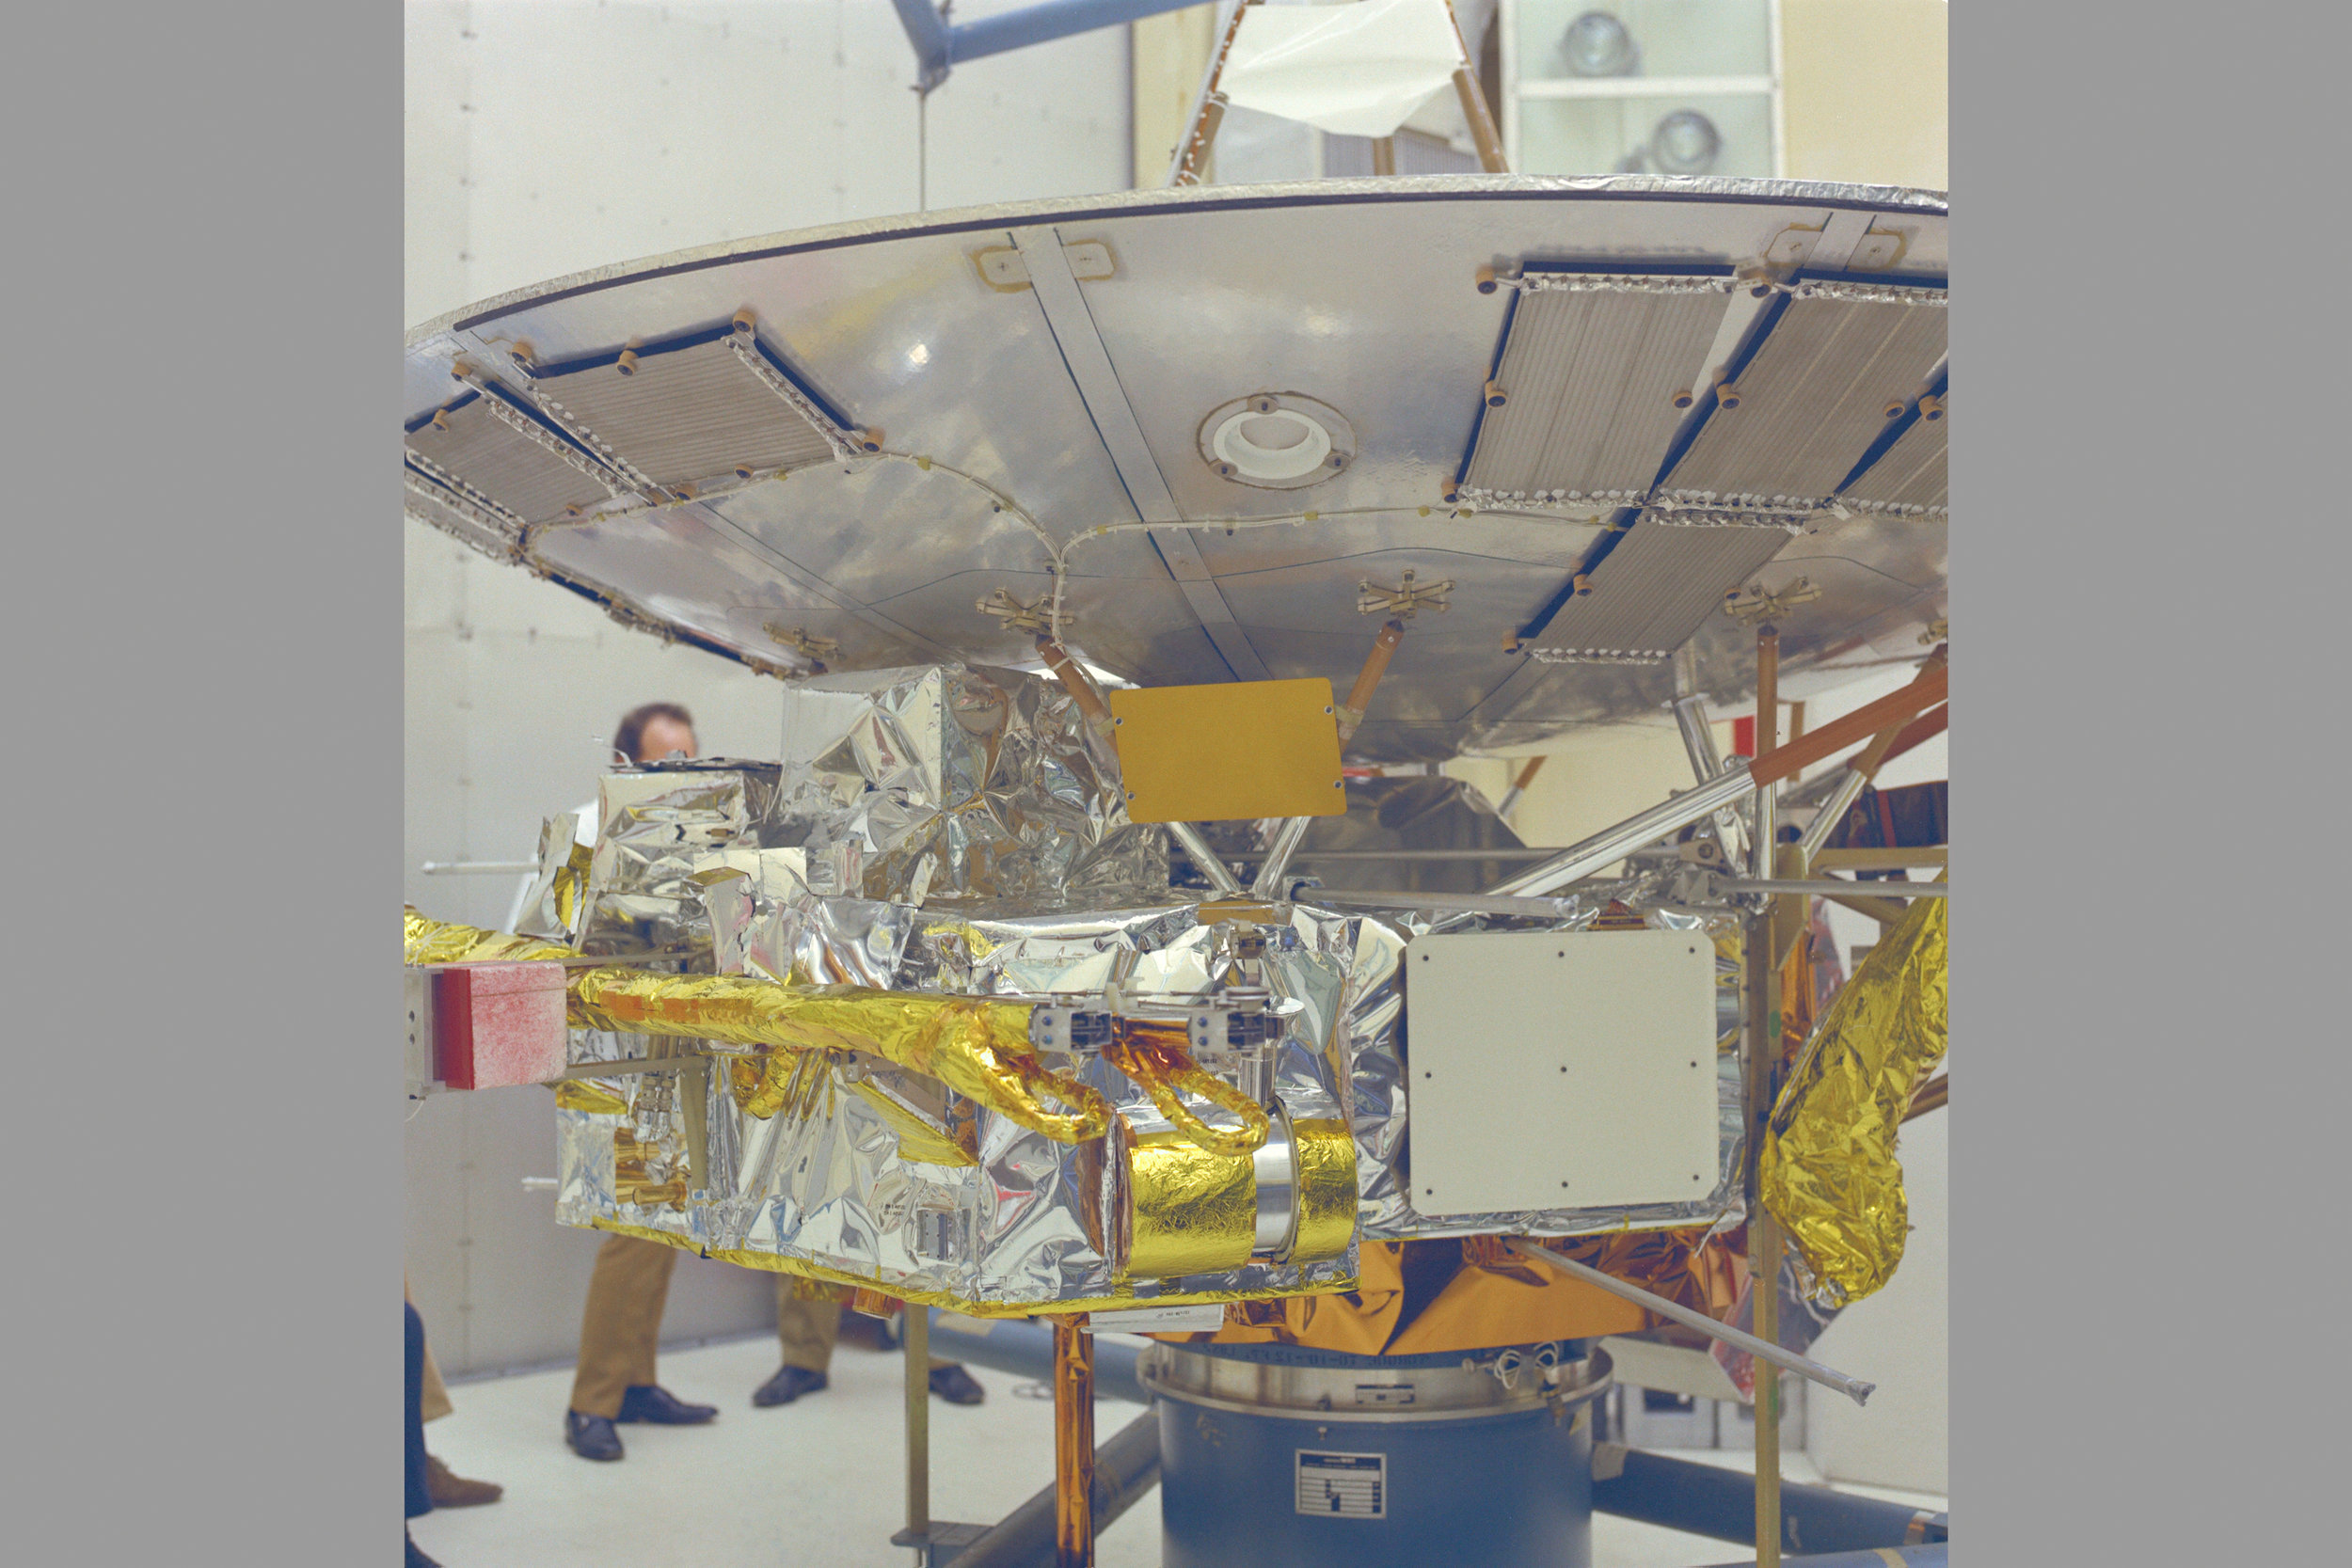
The first part of the probe that I modeled was the dish, and then piece by piece positioned other devices, connecting supports, wires, nuts, bolts and sensors to the dish, trying to keep as close to the drawings and pictures as I could.

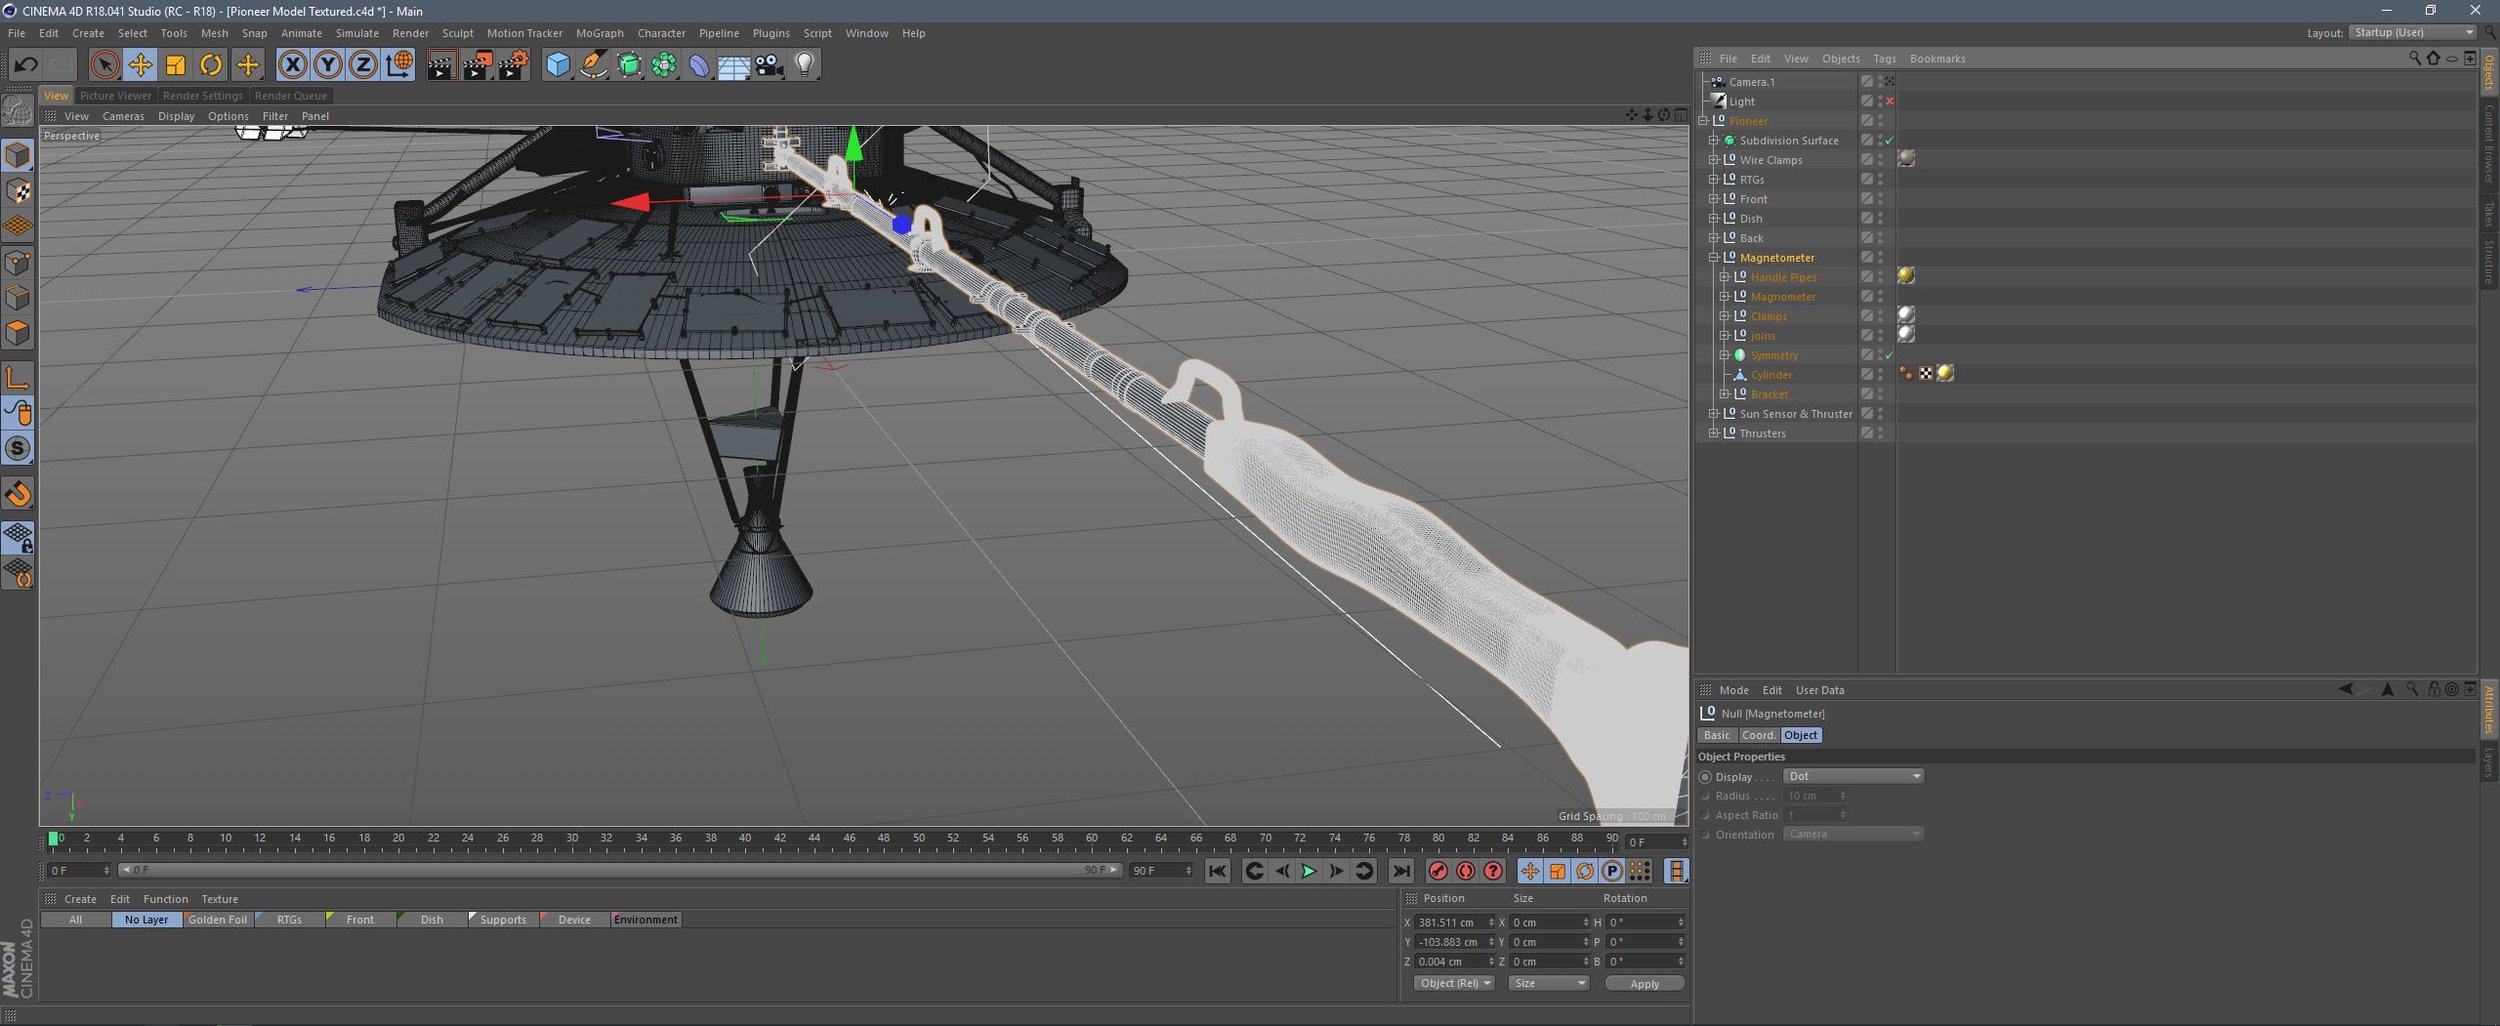
Below are a number of images featuring key groups of models for the probe. I modeled at reasonably high poly count due to using a high detailed sub-poly displacement material for a lot of the surfaces. I went into a large degree of detail as I was unsure how close I would be getting to the probe for some of the shots, so things like screws and bolts were modelled for many parts of the probe. Because the bus (main body) of the probe is covered in a golden foil, I put everything into a subdivision surface to smooth out any edges - also adding more polygons in certain high detail areas would cause the foil material to appear more creased, adding another level of realism.

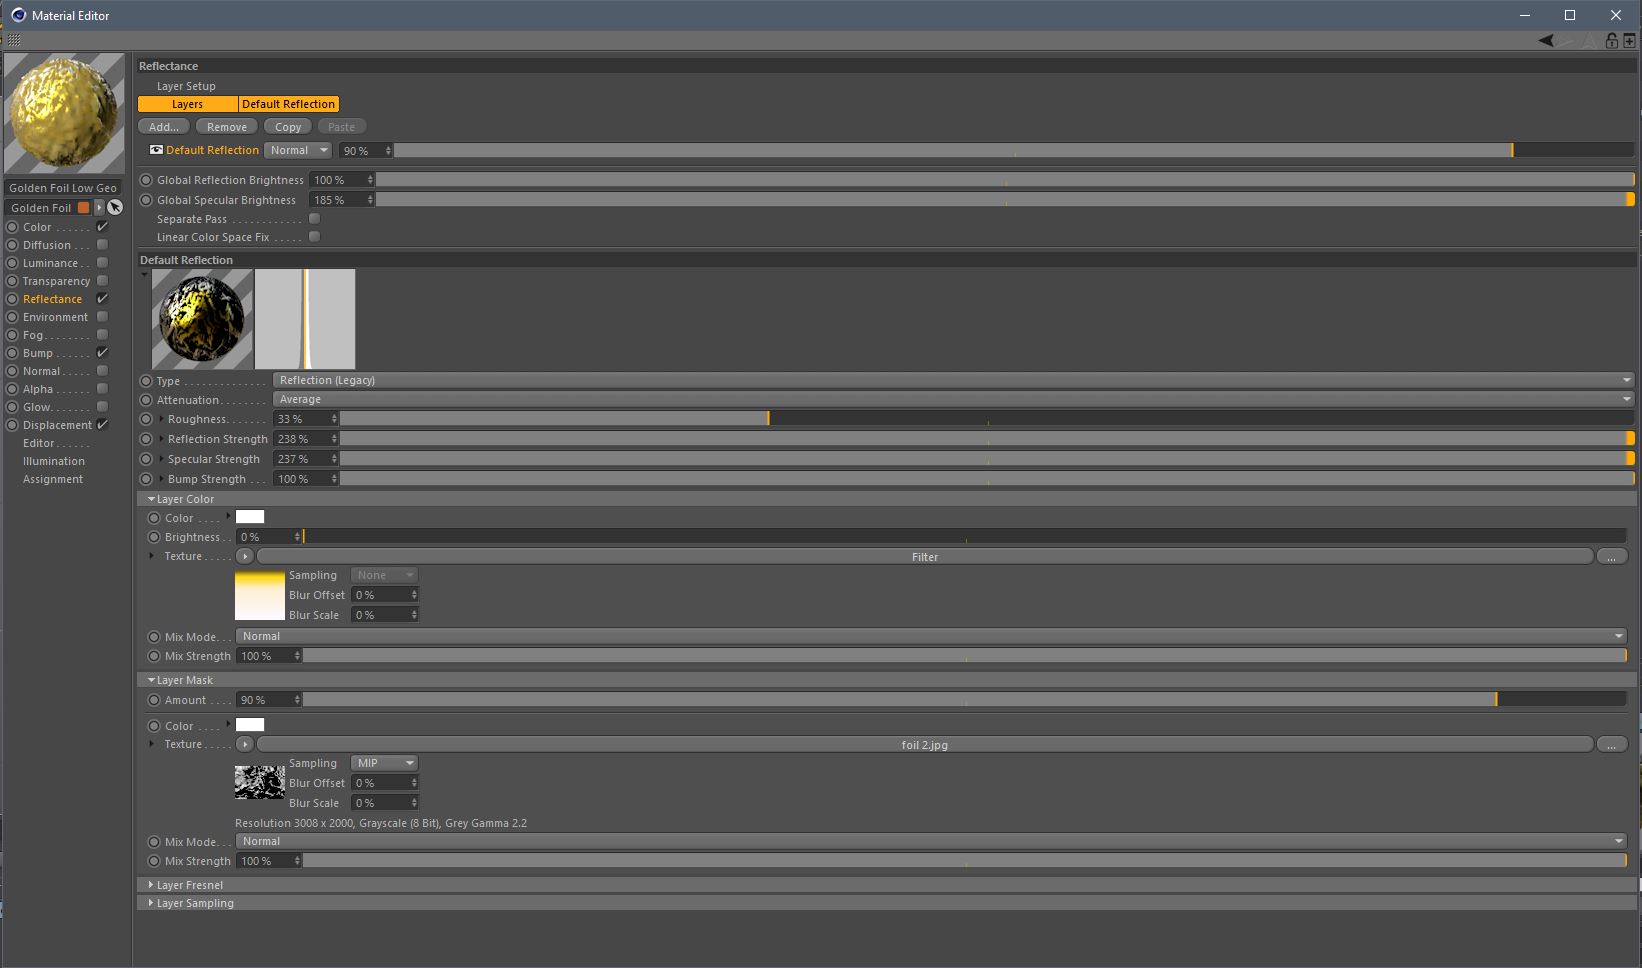
Below is an example of the golden foil material - 3 total versions of this material were made with different subdivision levels according to the geometry the material was being applied to - higher poly areas didn't always need as much sub-poly subdivision. The second image is a screenshot of each of the materials used for the project.

I revisited the model multiple times throughout the project, and made some pretty major changes, adding in more detail and working on look dev for hours getting the foil texture right. In the end, the total number of objects created for the model was 804, and a total of roughly 1 million polygons, which still ran relatively smoothly for playback. Having everything organised meant I could easily turn certain objects on and off to speed up my workflow - and most importantly it made each object very easy to find!

And lastly, the final model rendered out! There'll be plenty of shots to see it in the final film once it's released - which will be very soon now! Thanks for reading.

The Making of 'The Interstellar Medium' #6 - Saturn's Rings

Saturn is a cool planet. It has rings, over 60 moons and is made of gasses - this always amazed me from even a young age - I remember reading 'The Magic School Bus Explores the Solar System' and then playing the computer game on my fathers computer. The rings in particular really captivated me... But we're getting a little off topic here, lets get a little more into the shot itself.

But just before we do that, this shot is  actually somewhat accurate to how astrophysicists believe the rings may look. The shot takes place at the innermost 'D' ring of Saturn, which is the least dense ring.

So, this shot was to set the scene of Saturn, the next shot was fairly static so some movement here was necessary, so the rings felt like a good way to achieve this. The rings were made of many standard geometric shapes (cubes, spheres, pyramids) which were randomised in scale and vertex position, and then displaced via a displacement texture. These objects were then cloned, randomised, and had dynamics applied to them. This cause a lot of playback issues, but by separating each set of rocks (of which there were 10) into separate scene-files, I was able to work efficiently and get near real-time playback. I also rendered them seperately with depth passes as this left me more flexibility in post. Here is the C4D scene with all the ring ice (yes, they're made of ice, not rocks!) merged into one file.

The below image shows the ring texture (which was an alpha material) being used to create the shadow on Saturn's surface and atmpsphere.

In post I had to do a little masking and re-positioning of layers, and then added in a light near the top to highlight Pioneer's location. Click the image above for a more detailed view!

And there you have it! The full sequence will be available for viewing once the film is release. Thanks for reading!

The Making of 'The Interstellar Medium' #5 - The Asteroid Belt

I've done a lot of typing, and you've done a lot of reading - so here is a video of me sculpting an asteroid in Mudbox and doing some test compositing in After Effects, all to some repetitive music. This was part of my research into sculpting asteroid, and I ended up making 6/7 other asteroids for the final shot, however only 4 were used in the end.

Okay, so there is a little more reading... The final shot as two of the asteroids impacting each oth-  yes, I KNOW that asteroids in the Asteroid Belt aren't this close together (by a good 600,000 miles), it would have been a damned miracle if anything made it through the belt given it is around 1 AU wide. But rocks smashing into each other is pretty cool, so lets throw astrophysics out of the window for this one (again). Okay back to the more technical aspects - multiple impact rocks were made in C4D which consisted of mostly very low poly spheres which were then displaced further. I used a number of standard Cinema 4D emitters to sling rocks out from the impact zone in all directions, but with a slight emphases on the direction the asteroids are moving.

Pioneer just survives the impact and glides past the chaos, and using lens effects to emulate sunlight glinting off Pioneers golden foil, I was able to draw the viewers eye from the impact, to Pioneer, and back to the impact. Below is the compositing file, however I wont go into any detail here as it was a fairly straightforward colour correct job other than the flare keyframing and depth passes.

I was aiming for a look similar to the images taken by the Rosetta probe, in terms of visual style, and think the goal was met! Finally,  the bit everyone has been waiting for, the final image; and as always, the full sequence will be available for viewing once the film is finished! Thanks for reading.