I'm deep into the post-production phase for Dreamt Futures. With storyboarding done and a previz edit complete, I'm excited to share some updates. Five shots are finished, and the remaining 20 plus are in various stages, from planning and layout to just getting started. In this post, I'll talk a bit about the production of the first two shots and share some stills without giving too much away.
Lick Observatory
The film begins in the hills outside San Jose, California, at the historic Lick Observatory. The main building houses the Great Lick Telescope, a massive 36-inch refractor. Both the telescope and the observatory are named in honor of James Lick, who dedicated much of his wealth to scientific endeavours, including the construction of the world's most powerful telescope at the time. When James Lick died in 1876, he was the wealthiest man in California and is actually buried in a tomb beneath the telescope.

The Lick Observatory in winter. The Large dome is where the Great Lick Telescope is housed.
Space artist Chesley Bonestell (who Dreamt Futures is focused on) born just two days before the telescope's first light in 1888, visited the observatory as a child. Viewing Saturn through the newly built telescope ignited his passion for space. This moment also serves as the inspiration for the film's opening scene.
Shot Production
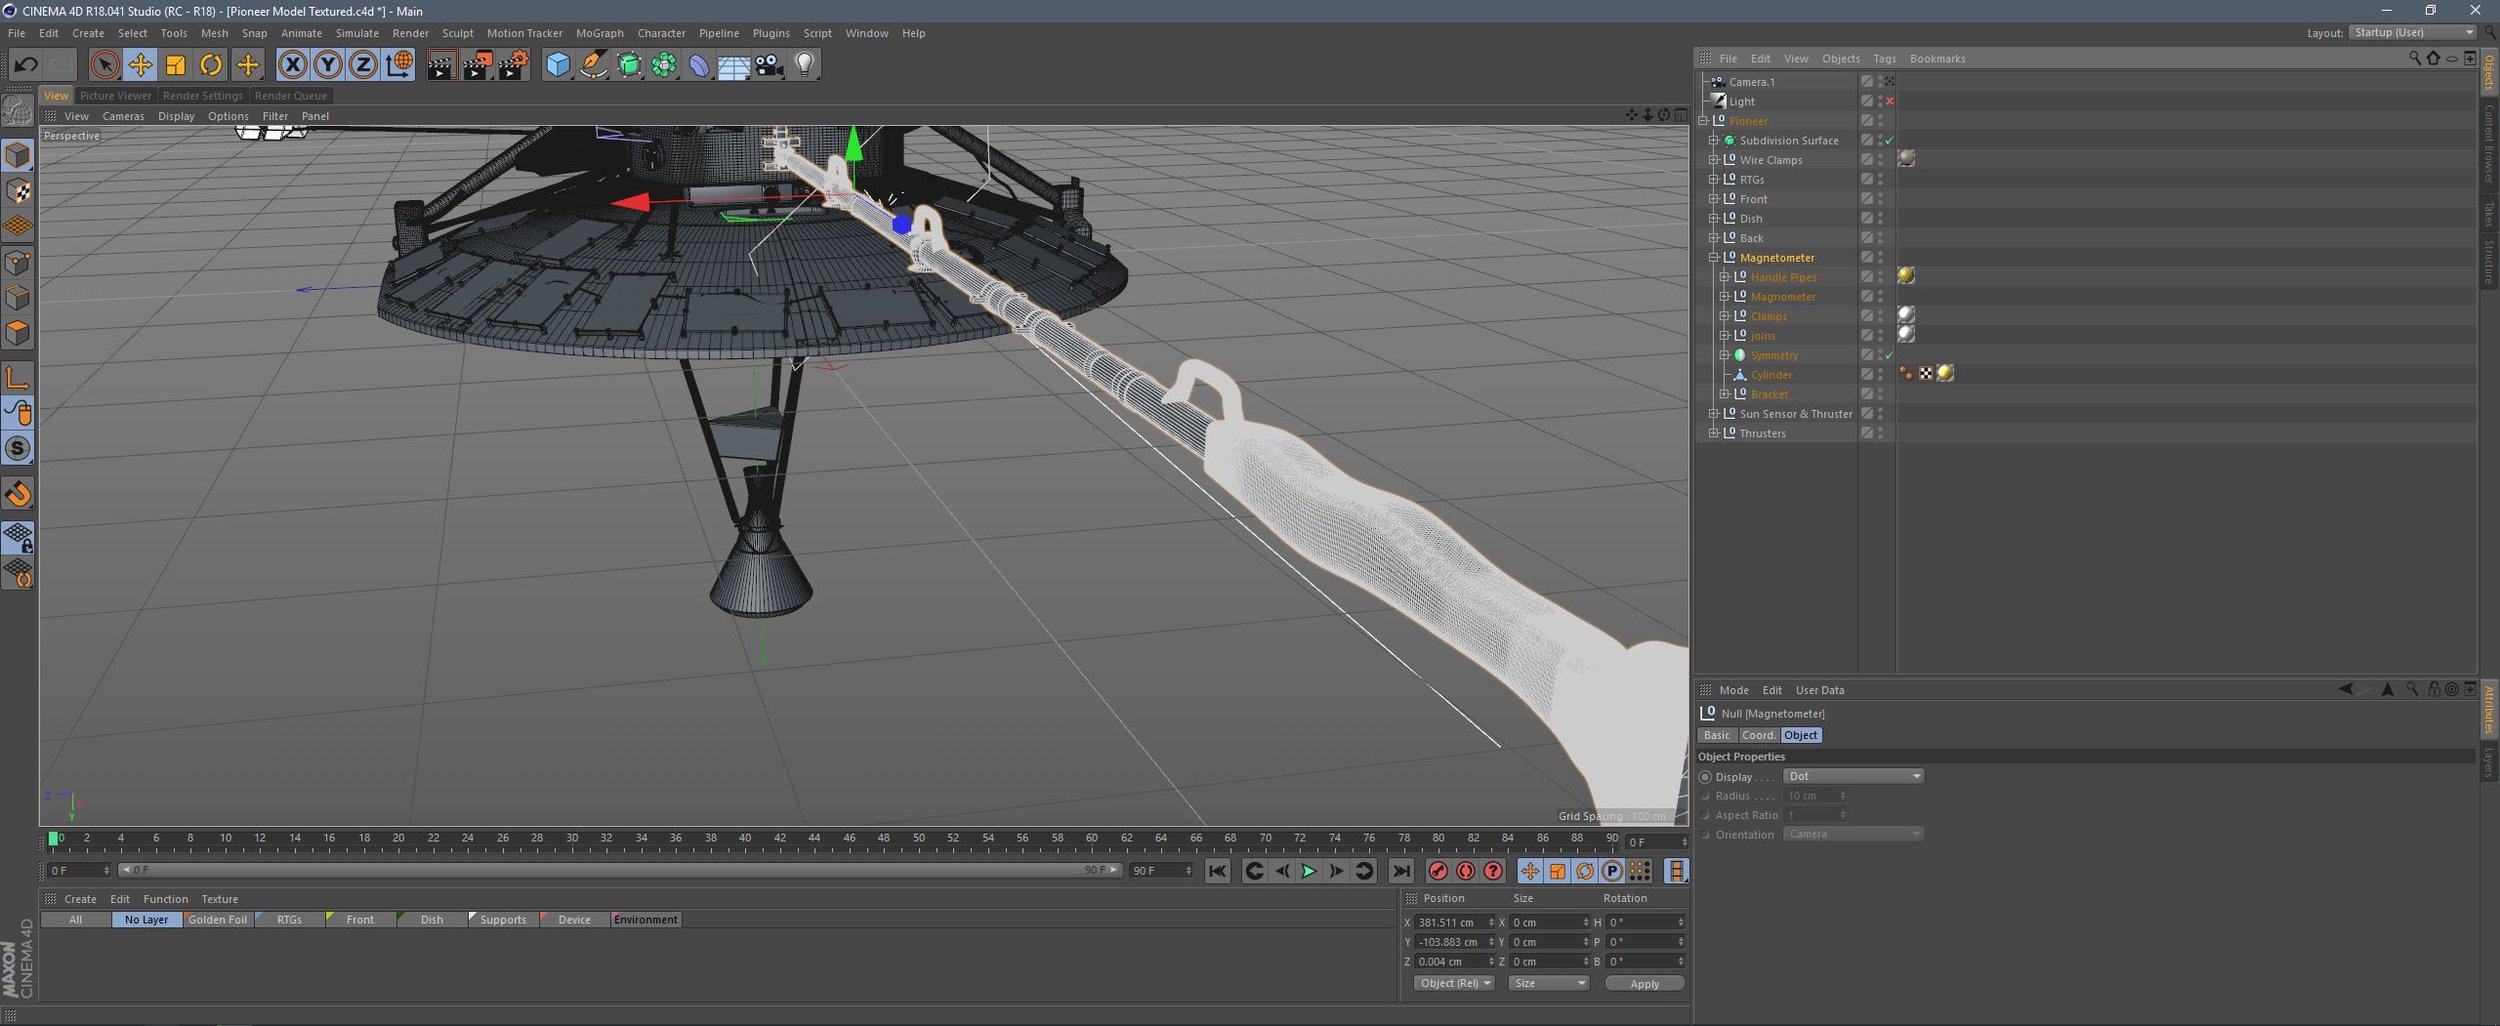
Cinema 4D Viewport rendering of the scene set up.
To create the landscape, I carefully reshaped areas of the terrain where the observatory is located and filled in the background with DEM earth. This approach ensures the landscape closely resembles the actual location, using satellite imagery and Digital Elevation Model (DEM) data for accurate terrain height.
The pink and green blocks represent foliage scattered across the landscape. I added more trees around the observatory than there are in reality. This artistic choice helps break up the horizon lines and creates a more interesting gradation of shading, enhancing the sense of depth, distance, and scale. Placing trees on the more distant hills (in pink) also adds realism; the varied tree heights break up the horizon line and help the viewer gauge the distance to the city in the background.
For the outskirts of San Jose in the distance, I scattered particles across the geometry in both random and grid-like patterns to mimic streets. I used emissive materials to light these particles, simulating city lights, and slightly randomised their colours from white to gold, with some green and red lights to represent traffic signals. I also applied a subtle twinkling animation to some of the lights.
Additionally, I added clouds generated in Embergen to create further separation between the landscape layers. This adds an engaging level of contrast and balance, helping to silhouette the observatory structures and trees.
The final shot - modern day San Jose and the Lick Observatory. The shot was composited in After Effects (Including a heat haze effect over the city which was controlled via a depth pass), and graded in Premiere Pro.
The Telescope
Viewport view of the Telescope Scene

The Telescope soon after it’s opening in the late 1800s
I knew creating the telescope itself was going to be one of the more challenging and time-consuming aspects of the films production, which is why it was tackled early. It needed to be modelled in detail for two shots, one at very close range and one at middle distance. Finding good reference photos and understanding how the telescope moved and operated was quite a challenge due to the lack of available reference material. However, I managed to find some great pictures on Flickr from people's holiday snaps and got to work re-creating the scene.
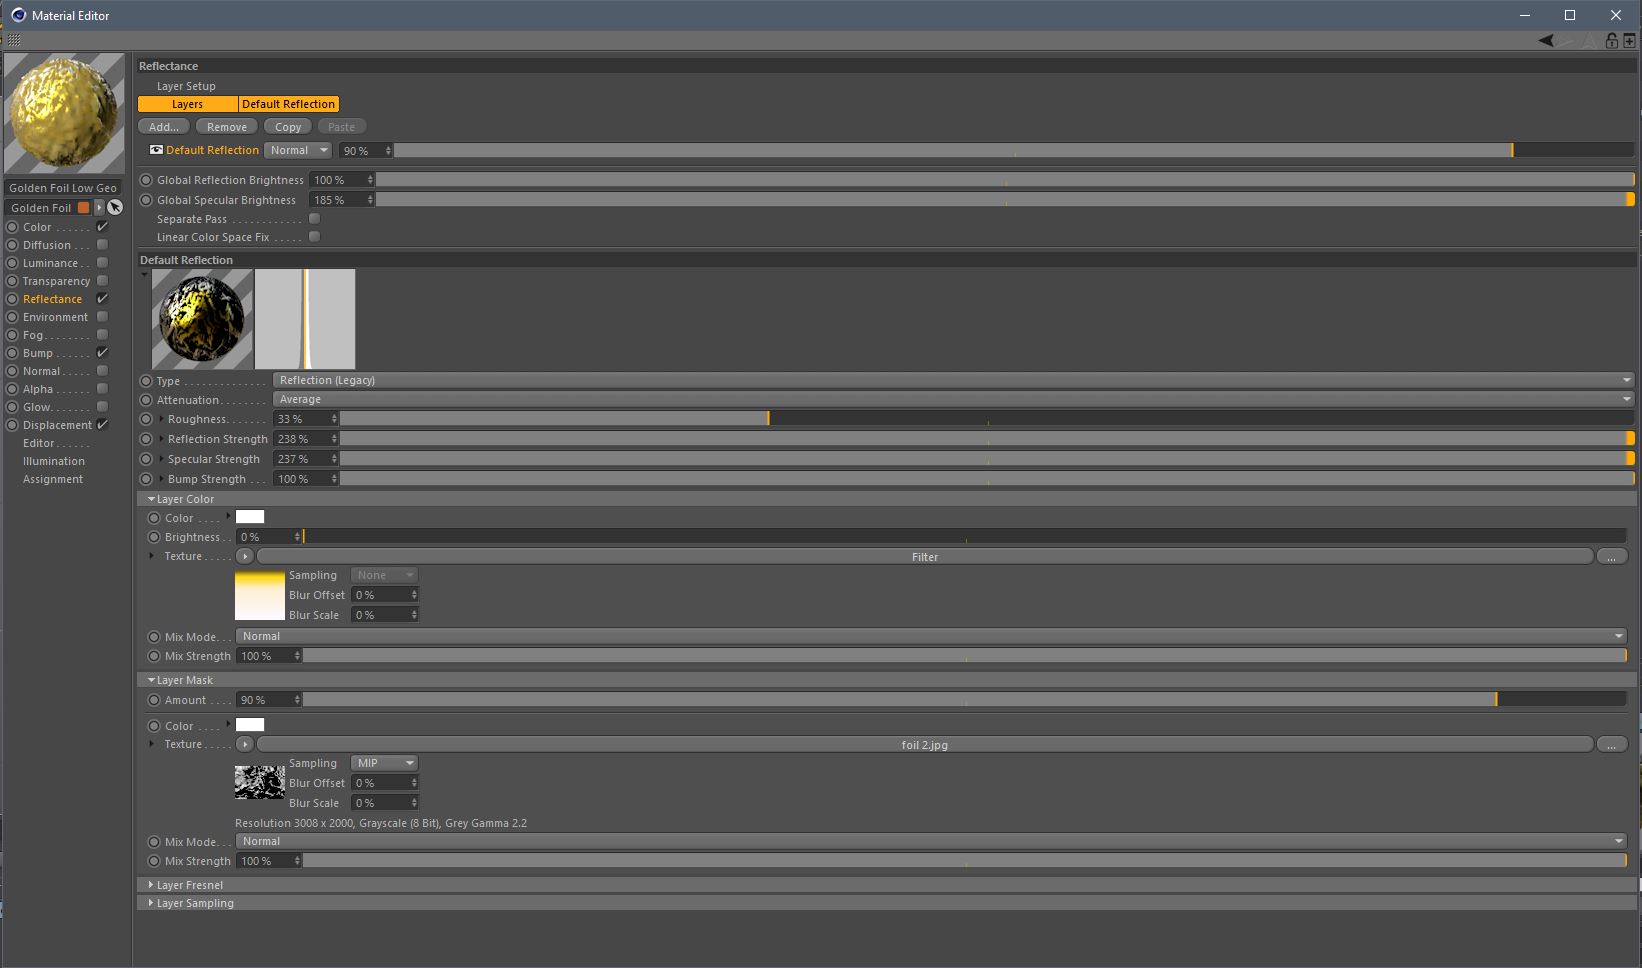
The second challenge was the domed structure that houses the telescope. An intricate truss-like structure supports the dome, along with mechanisms below that open the huge doors to the stars and orient the observatory. I modeled the telescope in Cinema 4D, then textured, lit, and rendered it with Redshift 3D. For the telescope material, I created an entirely procedural shader to imitate paint wear and tear and heavy rusting in certain areas. The telescope is well over 100 years old now, so it isn’t quite as shiny as when Bonestell first saw Saturn!
Lighting this scene was extremely satisfying, as the structure creates incredible shadow patterns. Normally, the lights would be off to preserve night vision and achieve the best clarity for viewing celestial bodies through the telescope. However, for a film shot, complete darkness wouldn't work. There are some red lights for visibility within the observatory building, so I took some artistic license and increased their intensity to light up the dome.
One of the finished shots of the Lick Telescope and Observatory dome - you’ll have to wait for the full release for the other!
I hope you enjoyed a peak behind the scenes at how the filmmaking process has worked for these first two shots. There will be more to come in the near future!