The Making of 'The Interstellar Medium' #5 - The Asteroid Belt

I've done a lot of typing, and you've done a lot of reading - so here is a video of me sculpting an asteroid in Mudbox and doing some test compositing in After Effects, all to some repetitive music. This was part of my research into sculpting asteroid, and I ended up making 6/7 other asteroids for the final shot, however only 4 were used in the end.

Okay, so there is a little more reading... The final shot as two of the asteroids impacting each oth-  yes, I KNOW that asteroids in the Asteroid Belt aren't this close together (by a good 600,000 miles), it would have been a damned miracle if anything made it through the belt given it is around 1 AU wide. But rocks smashing into each other is pretty cool, so lets throw astrophysics out of the window for this one (again). Okay back to the more technical aspects - multiple impact rocks were made in C4D which consisted of mostly very low poly spheres which were then displaced further. I used a number of standard Cinema 4D emitters to sling rocks out from the impact zone in all directions, but with a slight emphases on the direction the asteroids are moving.

Pioneer just survives the impact and glides past the chaos, and using lens effects to emulate sunlight glinting off Pioneers golden foil, I was able to draw the viewers eye from the impact, to Pioneer, and back to the impact. Below is the compositing file, however I wont go into any detail here as it was a fairly straightforward colour correct job other than the flare keyframing and depth passes.

I was aiming for a look similar to the images taken by the Rosetta probe, in terms of visual style, and think the goal was met! Finally,  the bit everyone has been waiting for, the final image; and as always, the full sequence will be available for viewing once the film is finished! Thanks for reading.

The Making of 'The Interstellar Medium' #4 - Nebulae

Nebulae. Great word. This was by far the most challenging shot as fluid dynamics were something I was not that experienced with - specifically Turbulence FD (I had some previous experience with Maya's Fluid Effects). This shot was originally intended to be a matte painting, however I wanted to create something new instead of an already existing nebula, so instead opted for fluid effects. Not only was generating the Nebula a challenge, but compositing the shot was too difficult.

Now, before we get started, I am fully aware that if you were this close/inside a nebula you would not be able to see that you were inside one - but that's no fun, and I can change that with a computer! Alright, lets have a look at how this was done.

Above are the Cinema 4D scene files - in the top one you can see some of the settings I used. One of the most important settings for generating a nebula like simulation was the density dissipation. This meant the fluid would stay in dense clumps throughout the sim in certain areas based on a noise map that the fluid was emitted from. By using one light with soft shadows to save on render times, i was able to set it up in such a location that dark shadows would appear in the densest areas, emulating the effects seen in many emission nebulae, but more commonly in dark nebulae.

After colouring the nebula with a gradient in the density render settings, I was able to pick out dense areas and colour them differently, specifically darker alluding to their density. These image sequences were then sent into After Effects for post.

Both compositions had many adjustment layers and effects applied to them to tie the whole image together (The 'shy' button is your best friend in compositions like this!). For both compositions I rendered out a noise layer which was applied to a plane positioned within the nebula in 3D space. This plane was then screened onto the composition below and had its opacity reduced. This created the wispy plumes of dust/smoke seen around nebula - they rarely suddenly fall off straight into space - nor is the space directly behind them always pure black. To create a contrast from the rest of the film which features quite a similar colour palette, I wanted the film to go out with a super colourful image to surprise the audience. I was aiming for a similar effect with the close ups of the stars seen previously in the film a this point. (Remember to click the images above for a more detailed view!).

Above are two screenshots from the finished shot, and as usual, the final version will be available for viewing once the film is finished, and these images are subject to change!

The Making of 'The Interstellar Medium' #3 - Aldebaran

Aldebaran is a giant orange star in the constellation of Taurus. Pioneer 10 is on a trajectory in the general direction of this star, so it earned a place in my film. I already had one shot of a star in the film, so I needed to make this one particularly stand out.

I decided to create another close up shot, however this time using a particle system to generate huge solar flares across the surface, with Pioneer racing around the star (at a not so safe distance). Despite the clear scientific inaccuracies, I wanted something dramatic, and nothing is quite as dramatic as fireballs exploding from a gigantic orange star.

The particle simulations were done with X-Particles, you can see my set up below: 

I set up multiple emissions, one major flare arcing away from the surface, and a few other more subtle ones inside the Star. Using particle groups, I was able to separate each flare and create varied dynamics for each one. 

Below, you can see the procedural shader I set up - this consisted of various noise shaders animated in varied ways to get an interesting pattern across the Star's surface. I rendered this as a greyscale image and colourised it in After Effects. Each noise layer from the shader was rendered out individually, as well as a layer which was painted in bodypaint to mask areas where the particle flow was emitted from the Star.

The Pioneer model was also rendered out, and then composited in After Effects. You can see my After Effects scene file below:

Quite a difference right? As you can see I used many adjustment layers, which I can cover more extensively if there is any interest, but they mostly consist of various glow effects, lots of masking, blurs, lots of colour correction and finally distortions. 

And, as always, the animated version will be available for viewing once the film is released, for now, here is a screenshot of the composited shot!

The Making of 'The Interstellar Medium' - #2 'The Surface of Mars'

Mars was one of the more challenging shots to complete given my time restraints. This shot is particularly unique as it is on the surface of a planet, rather than looking at an object from a distance, whether that be the Pioneer probes which the film revolves around or a planet. Not only was I pressed for time when it came to creating the visual effects, but I was pressed for time when it came to rendering too. This was one of the main issues with this shot, given most of the screen is filled with things that need to be rendered unlike many of the other shots which have matte backgrounds. Through separating everything into separate render passes and rendering those passes individually, as well as lots of tweaking of GI settings, I managed to get my render times a lot more workable (from 50 minutes a frame to around 7-12).

Enough about the rendering though, let's take a look at how I achieved some of the effects. The easiest part to do was the foreground rocks. For these, I used Quixel's Megascans, as it was a fast, relatively inexpensive to create a foreground effect without having to create complex models and find textures myself.

The mid-ground wasn't as straight forward though. After initial research, I downloaded some high resolution images from the HiRise sensor on NASA's Mars Reconnaissance Orbiter. The high resolution images are unfortunately in black and white, so using Photoshop, I recoloured them using other photos from the HiRise orbiter that were in colour as reference when painting in details. The black and white image was then brought into B2M to extract height information for use as a displacement map.

The maps were then loaded into a Cinema 4D material and by tweaking displacement settings I was able to achieve the desired effect. 

The animated version will be available for viewing once the film is released, for now, here is a screenshot of the composited shot!

The Making of 'The Interstellar Medium' - #1 'Black Holes'

One of the first shots I've worked on for this film was one that featured a black hole. After seeing Interstellar's 'Gargantua', I was inspired to create something similar, given the scientific accuracy of Interstellar's black hole.

I worked for a couple of days experimenting with various methods of creating a black hole, my first attempts were in After Effects - hoping to achieve something with various warp and distort effects. The result wasn't convincing, so I moved to Cinema 4D and started experimenting there instead.

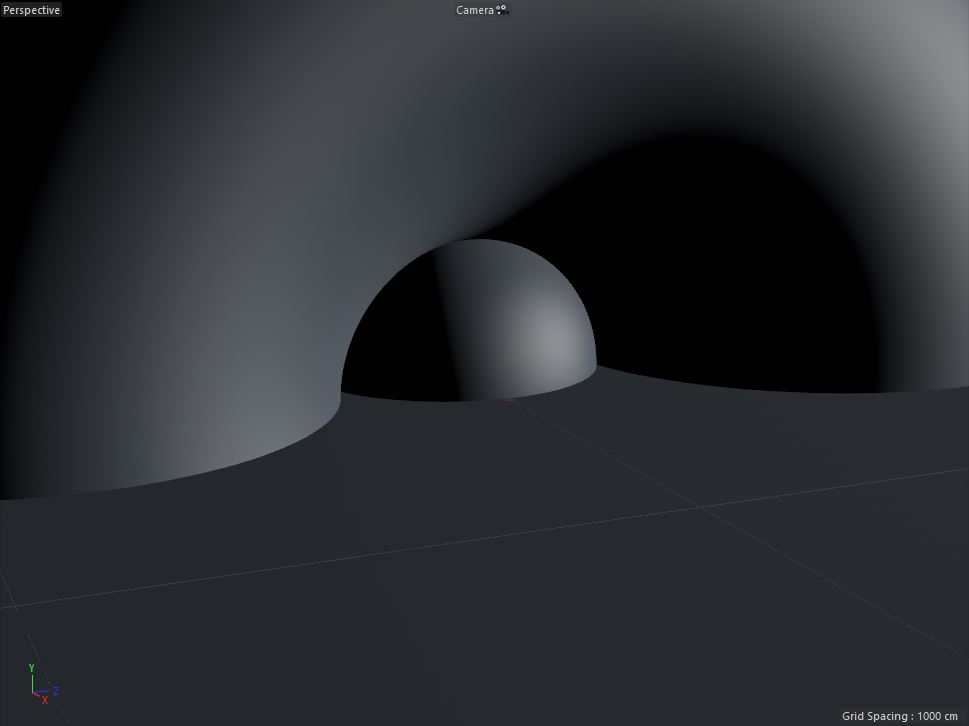
I came across a viable method which involved setting up a torus object to take the place of the gravitational lens. Adding a transparent and refractive material to the torus allowed the stars behind to distort through the mesh, and zip around the outside of it. A pure black sphere was placed in the centre to act as the black hole, and then a disk was placed intersecting these two objects, which was animated to rotate. The disk had a texture map applied to it that I built inside Photoshop. Below, you can see an un-textured, and a textured version of the black hole. 

A background of stars was loaded into a sky object, and I also composited a separate layer of stars directly behind the black hole to exaggerate the stars movement. The one hindrance that using this effect yielded is that the effect of the stars moving is only controllable based on the cameras position in relation to the torus (which is actually accurate, albeit not that flexible). I came up with a method to keep the distortion the same as the camera moved by having the torus constantly target the camera. This kept the facing of the torus constant, in turn keeping the level of distortion constant.

The animated version will be available for viewing once the film is released, for now, here is a screenshot of the composited shot!